Job Alerts
Prerequisite: Complete Job Discovery setup detailed here.
Job Alerts are a great way to keep your candidates engaged and aware of your current openings. Users can register directly in the conversation, or via two-way SMS (requires CSM setup).
Part One: Job Alert Registration
To add the ability to register for job alerts in a conversation, go to Flowbuilder and access the conversation you would like to use.
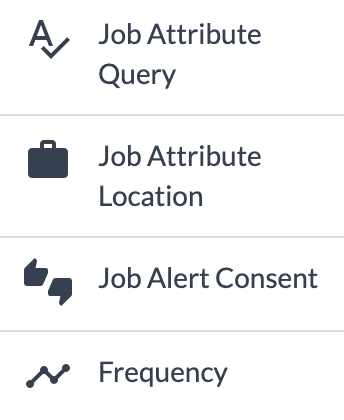
There are multiple pieces to the Job Alert Bundle, as we have a question for each setting:
- Job Alert Consent - Required - This is the opt-in question. A job alert will not send unless the user selects "yes"
- Job Attribute Query - Here the user can enter the keywords they would like to search with, such as "Engineer" or "Project Manager"
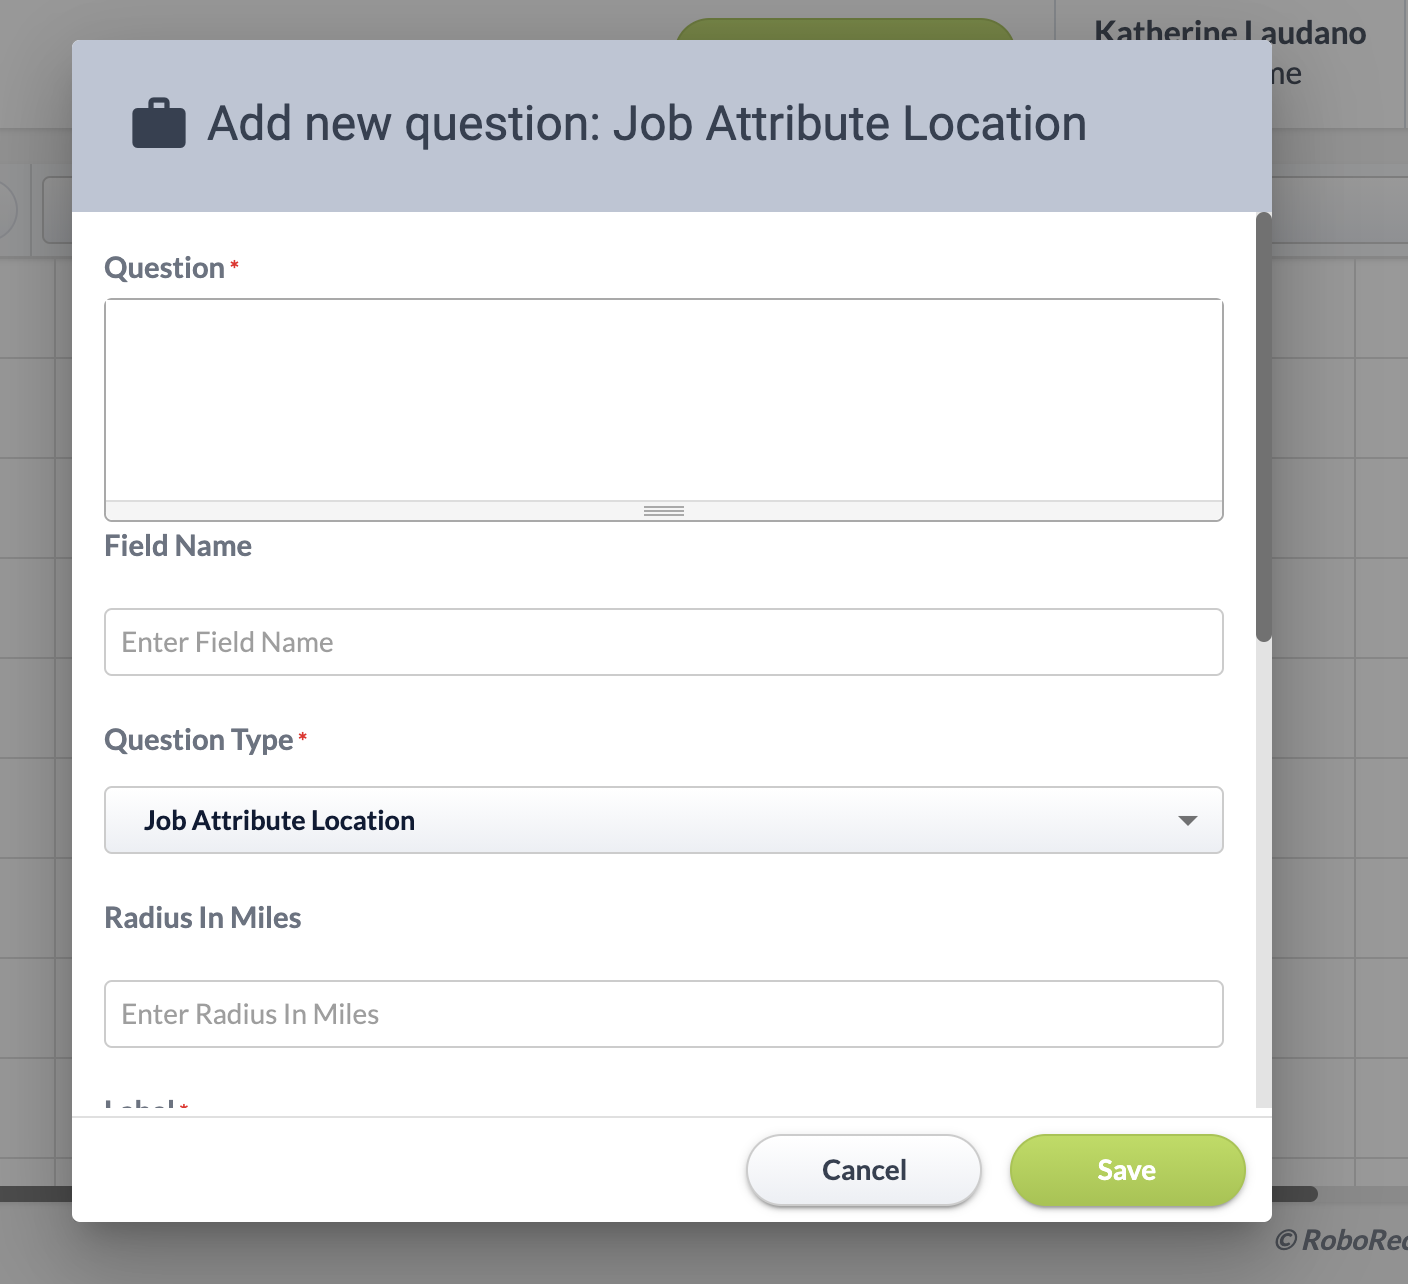
- Job Attribute Location (Configuration required) - Users can enter as much location information as they want - city and state or zip code is preferred - see below for more details
- Frequency (Configuration required) - Here the user can select how often they want to receive job alerts - see below for more details
Configuration
Job Attribute Location - Just as with job search, the radius must be set for this question type. Enter the mile radius you would like us to search - such as 25, 50, or 100.
Frequency - Here you must enter a few options for the user to select. The options themselves can have any names you want (such as "Daily"), but the values must be numerical (such as "1") as they will determine how many days to use as the frequency. An example of this is shown below.

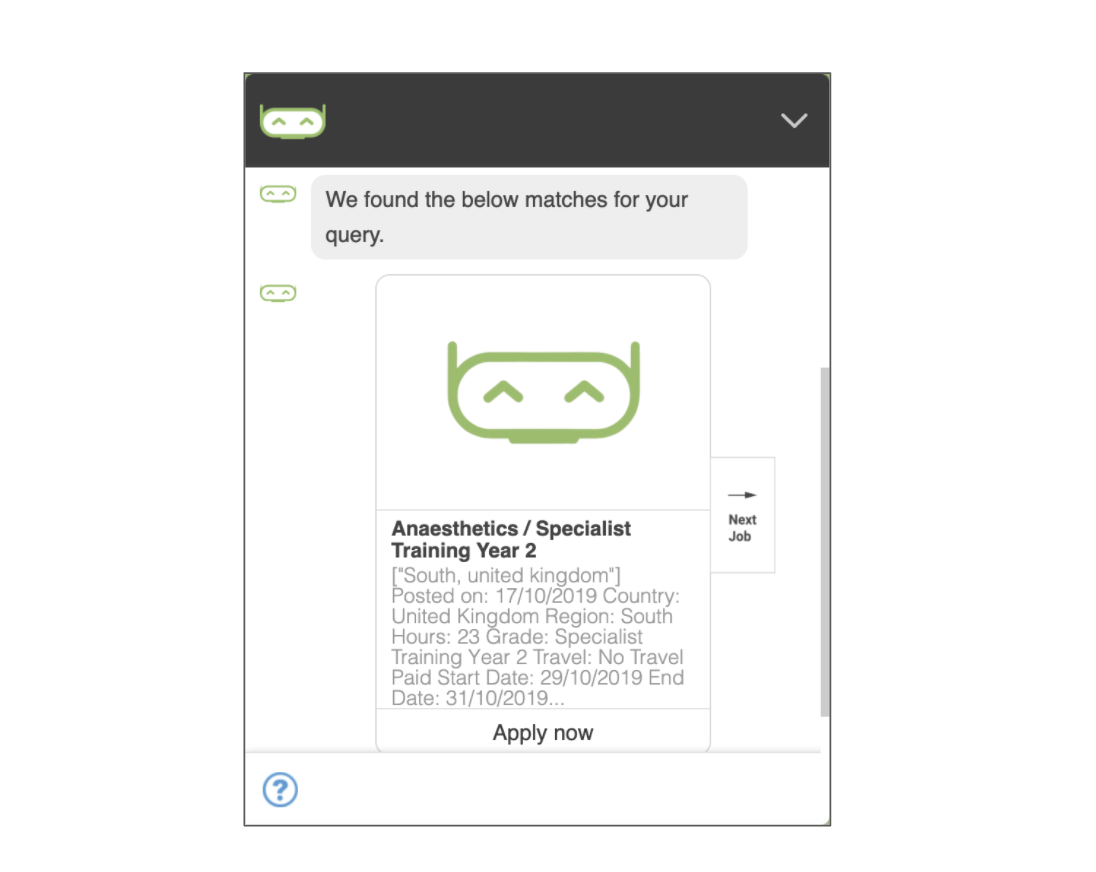
Part Two: Job Alert Display
Once you have all of those questions in your conversation, you are ready to configure the other side: Job Alert Display!
To do this, you will need to have a conversation that will display the results. You can edit this in Flowbuilder such as above.
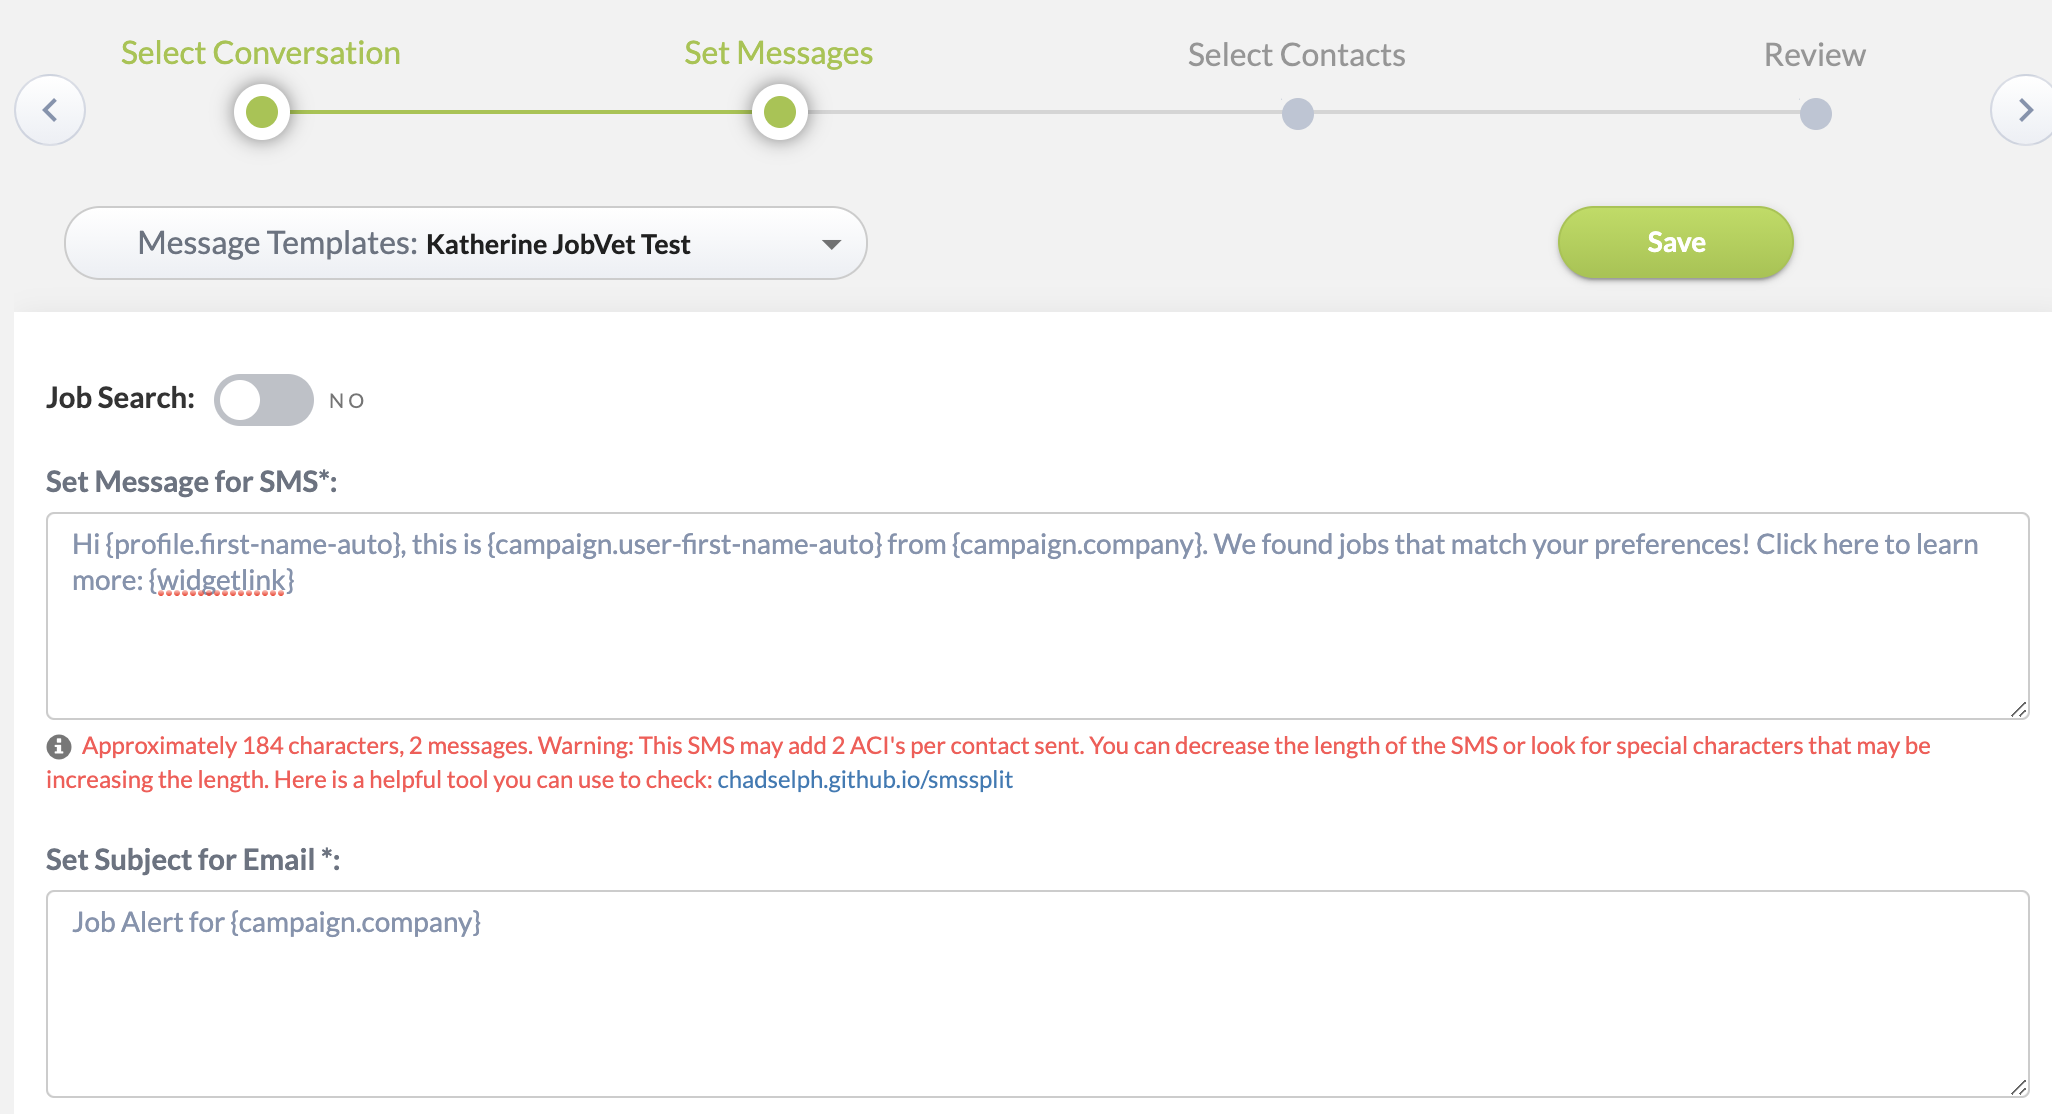
Creating the Conversation: The Job Alert Display conversation only requires one question type: Display Alert Results. You can also give users the option to change their job alert settings by including the registration questions from earlier - you can show them their current settings by using variables such as {profile.job-attribute-query} or {profile.frequency}.
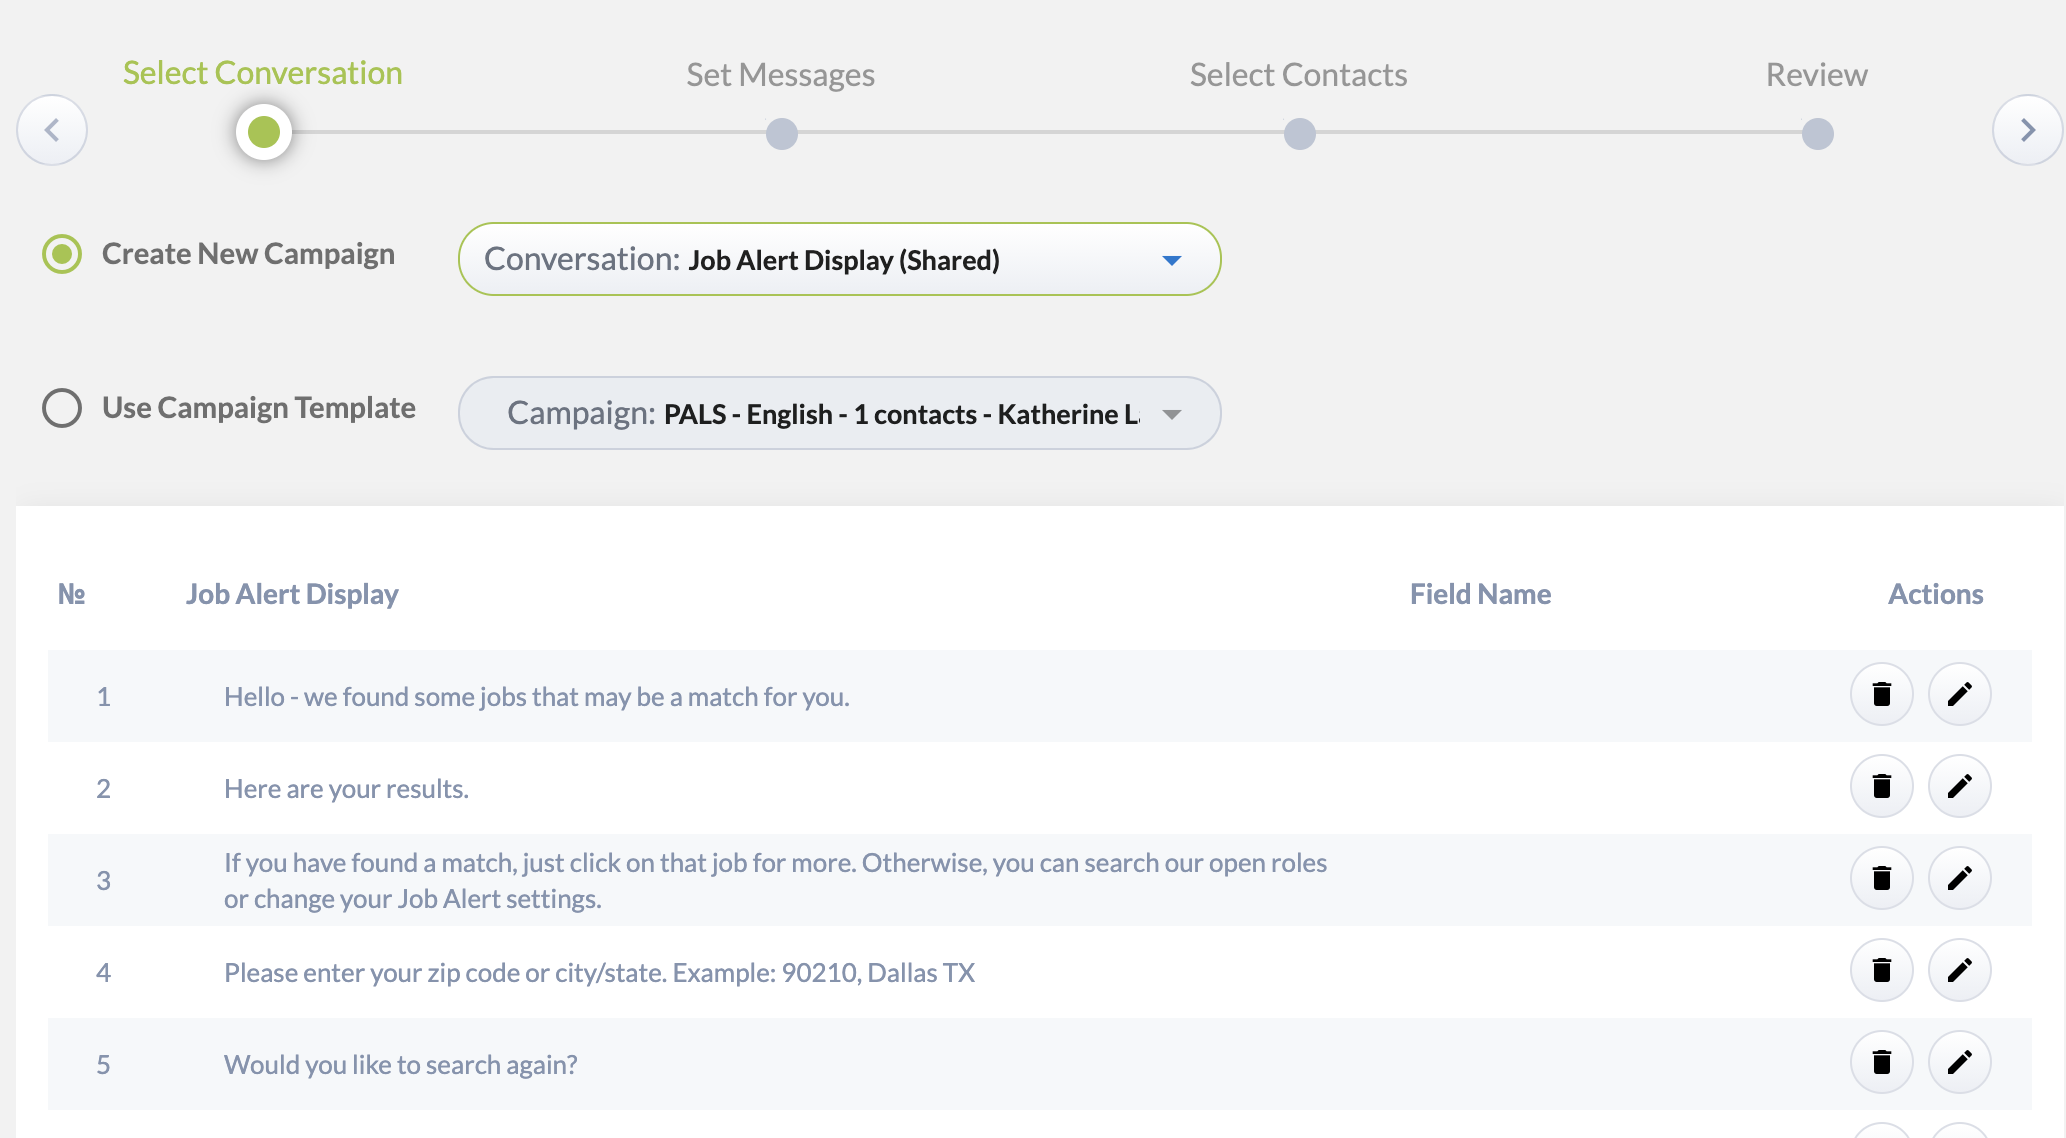
Creating the Messaging: Once your conversation is ready, you can go to the campaign creator to establish the messaging you would like to send to your users. Select your Job Alert Display conversation and then enter the SMS, email. Then select the settings you would like to enable and launch.
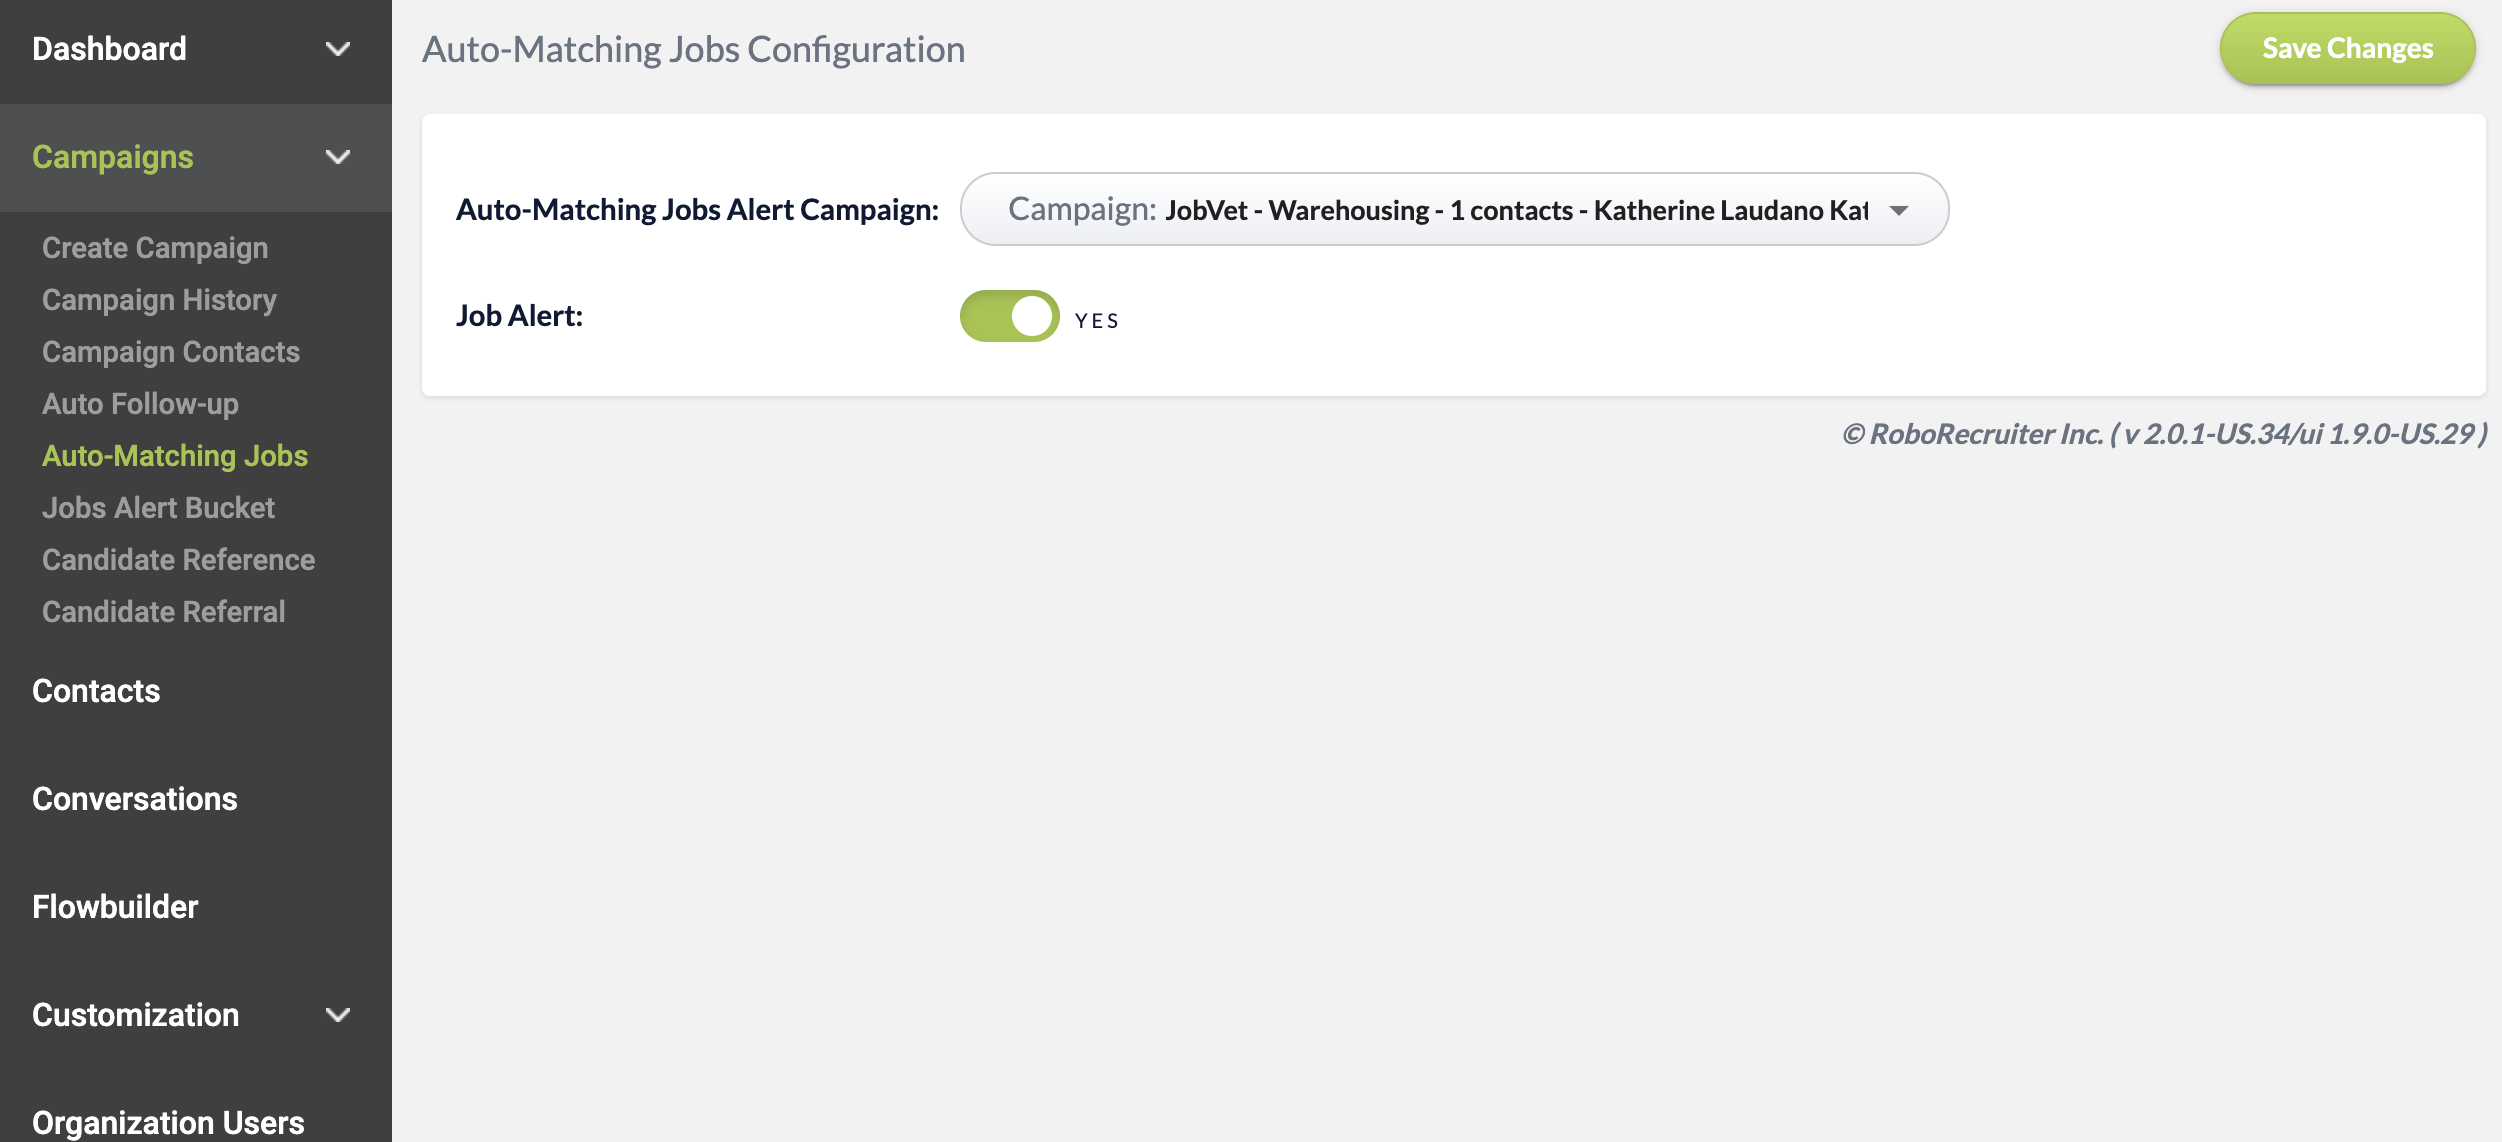
Set the Display Campaign: Once the campaign has been created, navigate to the Auto-Match Jobs section. Here you can select the campaign you would like to send when a job match is found and enable Job Alert.
Congratulations! Your job alerts are configured - you can now send a registration campaign to your candidates and they will begin receiving alerts at the frequencies they select.